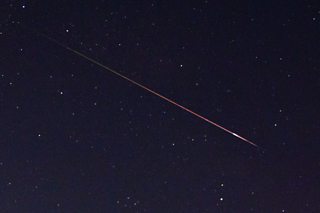
Pete's Guide to Photographing Meteor Showers
With the Perseid meteor shower coming up, now might be a good time to brush up on your astrophotography skills. The good news is that it doesn’t take a seasoned photographer to capture meteors – just good luck!

...it doesn’t take a seasoned photographer to capture meteors – just good luck!
I’d recommend a DSLR or equivalent camera with a wide-angle lens. Something in the range 14-30mm should be fine. A lockable remote shutter release cable is also required and it’s a good idea to have several charged batteries on stand-by as well as a spare storage card.
For more in depth tips about photographing meteor showers, keep reading...
A Step-by-Step Guide
Step 1: Camera settings
Set your camera to manual and the lens to manual focus. Select the lowest f/number and pre-focus the lens on a bright star or planet. Use the camera’s live-view for this and take your time - accurate focus is important. For all-night shoots, re-check the focus periodically.
Set the ISO to 1600-3200 for older cameras, 5000-8000 for newer ones.
Put your camera into continuous shooting mode; the setting where, holding the shutter button down causes the camera to take one shot after another until you release the button.
Step 2: Where to point?
Mount your camera using a simple tilt and pan tripod. For the thrifty – wedging your camera somewhere so it points upwards also works.
Aim roughly two-thirds up the sky. Any direction works but pointing northeast delivers short meteor trails pointing back to the Perseid radiant. Longest trails appear roughly southeast or northwest, north or east being a good compromise. Make sure the camera sees mostly sky. A large tree in shot may look picturesque but it’ll hide trails.
Step 3: What times?
Ideally, aim to cover all-night sessions on 9-16 August; 12/13 and 13/14 August being the peak nights. Rates and meteor brightness increase after 1am BST through to dawn.
Step 4: Setting the exposure
Adjust for a 30 second exposure. With the camera set up, take a single test shot and examine it. If your sky is light polluted the image may appear virtually white. If so, reduce the exposure setting and repeat this step. Anything showing stars is fine, don’t worry about getting the sky to look too dark though.
If you have a really light polluted sky and have reduced your exposure to 10s, don’t reduce it any further. Reset to 30s, reduce the ISO and repeat step 4 until you get a bright sky with stars clearly visible.
Step 5. Start shooting!
Using the lockable shutter release cable, press its shutter button and lock it down. Stay with the camera for a couple of exposures to make sure it’s taking sequential shots.
Step 6. Regular checks
Schedule hourly or half-hourly checks. Check whether the camera is working, the battery is okay, that there’s enough storage left and whether the front of the lens is free of moisture.
If moisture appears, you can remove it with a 12V hair-dryer. If you don’t have one, bring the camera indoors until the moisture has gone.
Step 7: Check for meteors!
Once finished, download images from the camera’s storage card and step through them one by one using an image viewing app (free ones available via the net). If you see a trail, rename the image with a prefix. For example, if you’re sure it’s a meteor add ‘m_’ to the front of the file name, for a satellite ‘s_’, plane ‘p_’ or if you’re unsure ‘u_’. This will allow you to easily group similar shots together when done.
Satellite trails do a good impression of meteors. If a trail persists over two or more frames, it’s a satellite!
Other showers
This year’s Perseids is favourable because the Moon is out of the way, but the weather can still cause issues. Don’t worry though as there are several prominent showers still to happen in 2023…
• Orionids in late October
• Leonids in mid-November
• Geminids in mid-December
And don’t forget to upload your pictures to our official Flickr page. We’ll pick our favourites to share on the show!
