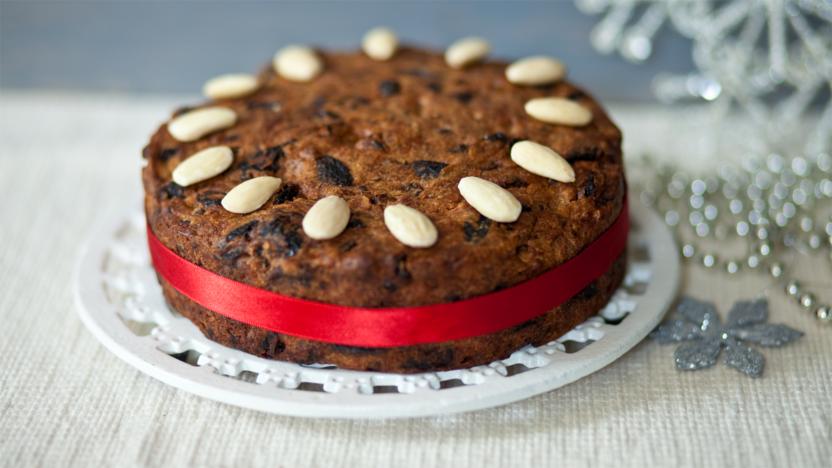
Last-minute Christmas cake
This moist fruit cake doesn't need to be fed so it's the perfect last-minute Christmas cake. The cake itself is very easy to make – the tricky part is the icing, but you can obviously decorate it however you please.
For this recipe you will need a deep 25cm/10in round cake tin, an electric hand whisk or freestanding mixer, a cake smoother and a piping bag fitted with a plain nozzle.
Ingredients
For the dried fruit
- 550/1lb 4oz mixed dried fruit
- 100��/3½�dz� dried cherries, halved
- 100��/3½�dz� dried figs, chopped
- 100ml/3½fl oz sweet sherry
For the cake
- 240ml/8½fl oz almond oil
- 120ml/3¾fl oz treacle
- 120ml/3¾fl oz golden syrup
- 200g/7oz soft dark brown sugar
- 1½ tsp bicarbonate of soda
- 160ml/5½fl oz boiling water
- 350g/12oz plain flour
- 50��/1¾�dz� cocoa powder
- 3 tsp mixed spice
- pinch of table salt
- 6 free-range eggs
- 435g tin crushed pineapple in juice, drained
For the buttercream
- 85g/3oz almond butter
- 200g/7oz unsalted butter
- 400g/14oz golden icing sugar
- 1 tsp almond extract
- splash milk
For the marshmallow fondant
- 250g/9oz mini white marshmallows
- 65g/2¼oz blue or purple candy melts, chopped
- navy blue gel food colouring
- 500g/1lb 2oz icing sugar, plus extra for dusting
- 25g/1oz vegetable shortening, plus extra for kneading
For the Royal icing
- 125g/4½oz royal icing sugar
- yellow or orange food colouring pastes
To finish
- 3 tbsp agave syrup mixed with 1 tbsp boiling water
- 200g/7oz ready-to-roll black fondant icing
- silver edible glitter (optional)
- white sprinkles (optional)
Method
Mix the dried fruit and sherry in a bowl and leave to soak for at least 30 minutes, but preferably for a few hours.
Preheat the oven to 170C/150C Fan/Gas 3½. Grease and line a 25cm/10in cake tin with baking paper.
Put the oil, treacle, syrup and sugar in a large mixing bowl and whisk until they just come together (the oil will still remain quite separate).
Mix the bicarbonate of soda with the boiling water and stir until it fizzes and dissolves. Pour into the oil mixture and whisk together.
Add the flour, cocoa powder, mixed spice and salt and whisk until smooth. Add the eggs and whisk until smooth and shiny. Tip in the pineapple, dried fruit and any sherry that hasn’t been absorbed. Mix until well combined and then pour into the prepared tin.
Bake for 2 hours, then insert a skewer into the centre, if it comes out almost clean the cake is cooked, if not bake for 10–15 minutes and test again.
Meanwhile, for the buttercream, beat the butters together until smooth and fluffy. Add the icing sugar, almond extract and a little milk and beat again, cover with cling film and set aside.
For the fondant, put the marshmallows and 2½ tablespoons water in a microwave-safe bowl and heat on full power for 40 seconds, remove and stir. Repeat this process, removing and stirring again at 30 second intervals until the marshmallows have melted. Set aside a few tablespoons of the melted marshmallows and add the candy melts to the remainder. Stir until melted, then add the navy gel food colouring.
Sift 450g/1lb of the icing sugar into a large mixing bowl and add the blue marshmallow mixture. Using an electric hand whisk beat until it comes together, starting on a slow speed to avoid a dust cloud. Grease your hands with the vegetable shortening and knead the remainder into the icing for 5 minutes, or until smooth (the icing will be very sticky to start with). Add more food colouring, if required, and knead again until smooth. Wrap in cling film and leave to rest.
In a smaller bowl repeat the process with the reserved marshmallows beating in the remaining 50��/1¾�dz� icing sugar (this will make the white circle that sits on top of the cake).
When the cake is cooked, turn it out of the tin and leave to cool on a wire rack. When the cake is completely cold, trim the top to remove the dome, if necessary. Divide the cake in two horizontally and then place on a cake board with the bottom of the cake upwards (so you have a really neat, flat top).
Spread an even layer of buttercream on the bottom cake, sandwich and cover the outside of the cake in a generous layer of buttercream using a small palette knife. Take care to get an even, smooth finish as this will make a big difference as to how smooth the finished icing is. Place the cake in the fridge until the icing has set and is firm.
Knead the blue fondant until smooth and pliable (microwave for 10 second intervals, if necessary) and knead in a little more vegetable shortening if required. Dust a worktop liberally with icing sugar and roll out the icing into a circle large enough to cover the cake.
Brush the cake all over with the agave syrup and use a rolling pin to lift the icing onto the cake. Carefully push down the icing to cover the sides of the cake including the board. Use a cake smoother to smooth and finish, then trim off any excess icing. Brush the top with edible glitter, if using. Wet the reverse of the white circle and stick to the top of the cake.
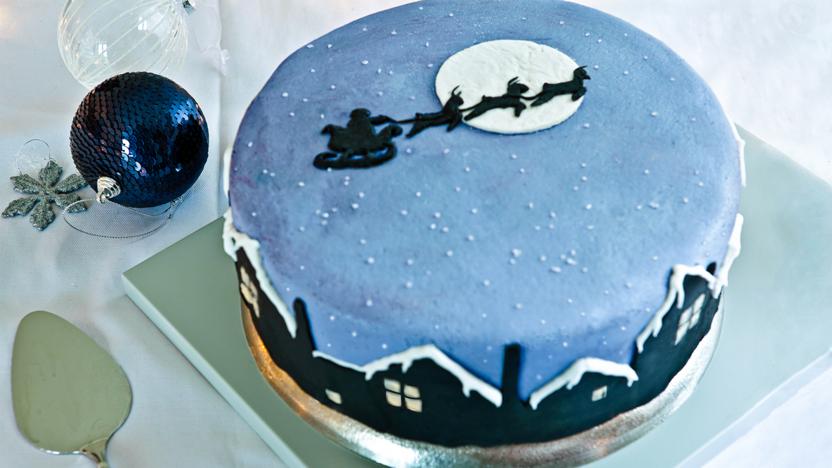
Roll the black fondant into a sausage shape using your hands. Lightly dust the work surface with icing sugar and roll out into a long, thin rectangle about 80cm/31in long. Using a small sharp knife cut a straight edge along one length and cut the other into a silhouette of rooftops – making sure it is no deeper than the height of the cake. Keep any offcuts to use to make Santa and his reindeer later. Brush the sides of the cake with the diluted agave syrup and stick the black fondant rooftops to it (to make this easier, cut the strip into smaller pieces that are easier to handle).
Reroll the offcuts and carefully cut out a silhouette of Santa and his reindeer (make this easier by printing a suitably-sized image from the internet, placing it over the fondant and using a pin to mark the out the edges).
Roll out the white fondant and use a large biscuit cutter to cut into a neat circle. This will make the moon on the top of the cake. Wet the back of the black fondant Santa and place on top of the cake going across the fondant moon.
For the royal icing, beat the icing sugar and a tablespoon of water together until thick and smooth, adding extra water if necessary. Put a third in a separate bowl and mix in a little yellow food colour (this will be used to form the windows). Put the white icing in a piping bag fitted with a small plain nozzle.
Use a stencil to paint windows onto the black fondant rooftops. Using the yellow royal icing and a small flexible knife, hold the stencil in place and run the icing over it. Clean the back of the stencil in between windows. If it gets a bit messy, allow the icing to dry and then scrape off any excess using a round tipped knife.
Pipe white royal icing onto the rooftops to look like snow. If desired, decorate the sky with small white dots to look like falling snow (alternatively use white sprinkles). Transfer to a cake stand or serving plate.
Recipe Tips
Buy 1.25kg/2lb 12oz ready-to-roll blue fondant to make the decorating easier.